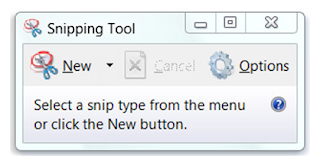
You can use Snipping Tool to capture a screen shot, or snip, of any object on your screen, and then annotate, save, or share the image.
You can capture any of the following types of snips:
- Free-form Snip. Draw a free-form shape around an object.
- Rectangular Snip. Drag the cursor around an object to form a rectangle.
- Window Snip. Select a window, such as a browser window or dialog box, that you want to capture.
- Full-screen Snip. Capture the entire screen.
After you capture a snip, it's automatically copied to the Clipboardand the mark-up window. From the mark-up window, you can annotate, save, or share the snip. The following procedures explain how to use Snipping Tool.
To capture a snip
- Click on the Snipping Tool from the start menu.
- Click the arrow next to the New button, select Free-form Snip, Rectangular Snip, Window Snip, or Full-screen Snip from the list, and then select the area of your screen that you want to capture.
To capture a snip of a menu
If you want to capture a snip of a menu, such as the Start menu, follow these steps:
- Click on the Snipping Tool from the start menu.
- After you open Snipping Tool, press Esc, and then open the menu that you want to capture.
- Press Ctrl+PrtScn.
- Click the arrow next to the New button, select Free-form Snip, Rectangular Snip, Window Snip, or Full-screen Snip from the list, and then select the area of your screen that you want to capture.
To annotate a snip
- After you capture a snip, you can write and draw on or around the snip in the mark-up window.
To save a snip
- After you capture a snip, click the Save Snip button in the mark-up window.
- In the Save As dialog box, enter a name for the snip, choose a location where to save the snip, and then click Save.
To share a snip
- After you capture a snip, click the arrow on the Send Snip button, and then select an option from the list.
For more information about Snipping Tool, see Snipping Tool:frequently asked questions.
